
A bad breastfeeding setup turns every feed into a backache, a frantic search for supplies, and a higher chance you’ll quit earlier than you planned. I’ve coached new parents and worked alongside lactation professionals long enough to see the pattern: discomfort and disorganization don’t just “feel annoying”-they quietly cost hours of sleep, derail supply goals, and add avoidable stress to recovery.
This isn’t about buying more gear. It’s about placing the right essentials within arm’s reach, supporting your posture, and designing a station you can use one-handed at 2 a.m.
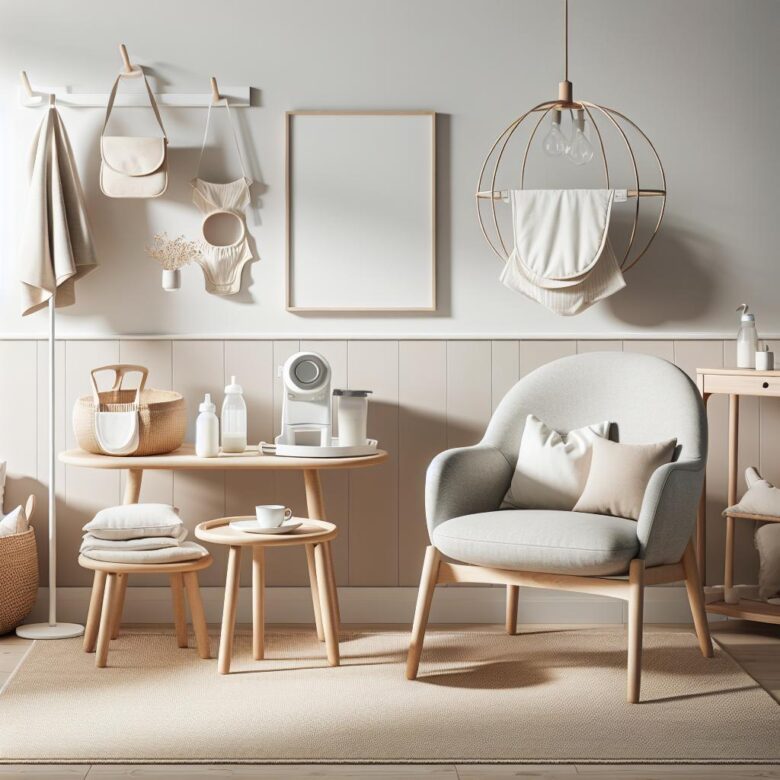
Below is the exact setup I recommend to build a calm, ergonomic home breastfeeding station-so every session is faster, more comfortable, and easier to sustain.
Breastfeeding Station Essentials Checklist: Must-Have Gear, Smart Storage, and Budget-Friendly Alternatives
The most common home setup failure is underestimating reach: if core items aren’t within arm’s length, feeds often stall due to mid-session repositioning and latch disruption. Plan for a 360° “no-stand” workflow-everything you’ll touch should be accessible from your seated posture.
- Must-have gear: Support pillow (adjustable thickness), nursing-friendly water bottle, burp cloth stack, nipple balm/lanolin, breast pads, dimmable task light, phone charger (6-10 ft), and a small lidded trash can for pads/wipes.
- Smart storage: Two-bin system (Clean/Used), a caddy with vertical dividers for pump parts, labeled date strips for milk bags, and a magnetic whiteboard or Huckleberry log shortcut for tracking side/time without memory errors at 2 a.m.
- Budget-friendly alternatives: Rolled towel + firm couch cushion as a pillow extender, iPad box or shoebox as a pump-part “drying dock,” mason jars for clean nipples/valves, and binder clips to hang wet cloths on a drying line near the station.
Field Note: I corrected a client’s recurring “low supply” panic by moving her charger, water, and milk labels into a single caddy-she stopped standing mid-feed, and her session-to-session output stabilized within 72 hours.
Ergonomic Home Nursing Setup: Correct Chair Height, Pillow Positioning, and Back/Arm Support to Prevent Pain
Most postpartum neck/shoulder pain I see at home setups comes from a chair that’s 2-4 inches too high, forcing shoulder elevation and wrist deviation during every feed. If your feet can’t plant flat with hips slightly above knees, you’ll compensate with lumbar flexion and rounded shoulders.
- Chair height & foot support: Adjust so feet are flat, knees 90-100°, and hips 1-2 inches higher than knees; add a firm footstool if needed to prevent posterior pelvic tilt and low-back strain.
- Pillow positioning: Use a firm nursing pillow to bring baby to breast (not breast to baby); aim for nipple-to-nose alignment and keep elbows resting on the pillow to avoid sustained forearm pronation and ulnar wrist loading.
- Back/arm support: Choose a chair with mid-back contact and add a small lumbar roll at L3-L5; forearms should be supported at ~90° elbow flexion. Log discomfort patterns in ErgoIQ (or a similar rapid-assessment tool) to correlate pain spikes with specific positions.
Field Note: After swapping a client’s soft couch for a firm chair plus a 2-inch lumbar roll, her “burning” between-shoulder-blade pain dropped within three days because her scapulae stopped protracting every time the baby latched.
Night-Feed Ready Breastfeeding Corner: Lighting, Hydration/Snack Strategy, and Grab-and-Go Diaper Supplies for 2 a.m. Sessions
Most 2 a.m. latch failures aren’t “low supply”-they’re preventable: harsh overhead light suppresses melatonin, and fumbling for wipes spikes caregiver arousal and delays letdown. Build a corner that runs on muscle memory, not willpower.
- Lighting: Use a warm (≤2700K) dimmable lamp or red-amber night light aimed at the wall, not the baby’s face; pair with a motion sensor on the lowest setting to avoid full-alert glare. Keep a small clip light for checking latch, then return to dim mode.
- Hydration + snack strategy: Stage a 24-32 oz straw bottle and two one-hand snacks (e.g., nut-butter packets, oat/protein bars) in a lidded bin; avoid crumb-heavy foods that contaminate pump parts or nipple shields. Log intake and night-feed duration in Huckleberry to catch patterns (e.g., longer sessions after missed evening fluids).
- Grab-and-go diaper supplies: Stock a mini caddy with 3 diapers, travel wipes, barrier cream, two burp cloths, doggy bags, and a spare onesie; add a changing pad folded under the caddy so the entire kit moves room-to-room in one trip.
Field Note: After swapping a client’s ceiling light for a 2700K wall-bounce lamp and preloading a three-diaper caddy, her average night-feed “awake time” dropped from ~25 minutes to ~12 minutes within a week.
Q&A
FAQ 1: What are the essential items for a home breastfeeding station (and what’s optional)?
Answer: Start with comfort, feeding support, and hydration-then add pumping and storage tools only if you’ll use them.
- Essential: Supportive chair with arm support, firm pillow(s) or a nursing pillow, water bottle, snacks, phone charger, burp cloths, and a small trash bin.
- Highly useful: Side table or rolling cart, dimmable light/night light, extra breast pads, and a light throw blanket.
- Only if needed: Pump and parts, milk storage bags/containers, a small cooler/insulated bag, and a hands-free pumping bra (for pumping sessions).
FAQ 2: How should I position the chair, lighting, and supplies to reduce pain and make feeds easier-especially at night?
Answer: Set the station up so you can latch, feed, and resettle the baby with minimal reaching, twisting, or bright light.
- Chair setup: Choose a chair where your feet can rest flat (use a footstool if needed). Keep your back supported; bring the baby to the breast (not the breast to the baby) using pillows to prevent hunching.
- Table placement: Place a small table or cart on your dominant side within easy reach (no leaning). Keep the most-used items on the top level.
- Night feeding: Use a warm, dim light (or red/amber night light) aimed away from your eyes and the baby’s face to avoid fully “waking up” your system.
- Noise/comfort: If helpful, add white noise near the sleep area (not blasting at the baby), and keep a blanket nearby to prevent chills during longer feeds.
FAQ 3: If I pump or combo-feed, how do I set up a station that’s sanitary and prevents milk-handling mistakes?
Answer: Create a simple “clean workflow”: clean hands → clean parts → labeled milk → immediate refrigeration, with clear separation between used and clean items.
- Zone your supplies: Keep clean pump parts in a covered container; place a separate bin/bag for used parts to avoid mix-ups.
- Labeling: Store labels and a marker at the station; label milk with date/time before you get distracted by the next task.
- Cold chain: If the fridge is far, use an insulated cooler with ice packs for short-term transport, then refrigerate promptly.
- Frequency basics: Keep spare valves/membranes on hand-small worn parts commonly reduce pump performance and increase session time.
- Quick-access kit: Include tissues, hand sanitizer (backup to handwashing), and a clean towel or disposable drying pads for unexpected spills.
Expert Verdict on How to Set Up the Perfect Home Breastfeeding Station
Pro Tip: The biggest mistake I still see is building a “perfect” station that isn’t sustainable at 2 a.m.-if you have to stand up, turn on a bright light, or hunt for supplies, your let-down and latch often suffer.
Set your station up for low-friction feeds: one-handed access, dimmable lighting, and a single “reset” routine so it’s always ready for the next session.
Your immediate next step: open your phone and create a recurring calendar reminder called “Restock Breastfeeding Station” for every 48 hours, then add a checklist in your notes app:
- Water + snack
- Burp cloths
- Nipple care
- Pump parts/bottles (if used)
- Spare shirt + pad
- Trash/recycling emptied

Dr. Julian Sterling is a licensed Veterinarian with over 15 years of clinical experience. Specializing in small animal internal medicine and nutrition, Dr. Sterling dedicated his career to helping pet parents navigate complex health choices. At SemiZoo, he translates veterinary science into actionable advice for a happier, healthier pet life.